
Why Nail Length Matters for Vinyl Siding in North Texas
Vinyl siding looks simple to install, but the fastening details decide whether it lasts twenty years or starts buckling after one summer. Nail length, nail placement, and how tight the nail sits all affect how the panel performs once the Texas heat and wind get to work on it. This matters just as much on a newer home in Frisco as it does on an older one in Fort Worth with layers of previous siding or insulation board already on the wall.
The DFW Metroplex sees wide temperature swings across the year, and vinyl siding expands and contracts with every shift. A fastening job that doesn't account for that movement shows up fast as rippling, gaps at the seams, or panels that pop loose in strong wind. Getting the nail length and technique right at installation avoids most of those headaches down the road.
What Happens If the Wrong Nail Is Used?
Using the wrong nail length creates problems at both ends of the spectrum. Too short, and the nail never reaches solid material behind the siding, so the panel has nothing real holding it in place. Too long for a thin wall assembly, and the nail can push through trim or interior material it shouldn't touch. The right length depends on everything between the siding and the stud.
Nail Length and Penetration Depth
A siding nail needs to pass through the panel's nailing hem and any sheathing or foam board, then drive at least a short distance into solid wood framing or sheathing rated to hold a fastener. On a wall with just siding over plywood sheathing, a shorter nail does the job. Add an inch of foam insulation board underneath, and the nail needs to be longer to still reach solid wood.
This is one of the most common mistakes on re-side jobs. When a crew adds insulation board over existing siding or sheathing, the original nail length that worked on the bare wall no longer reaches deep enough into the studs. The fix is simple on paper, use a longer nail, but it gets missed often enough that it's worth asking about before the job starts.
Nail Type and Material
Vinyl siding nails are typically corrosion-resistant, with a wide head that won't pull through the nailing hem's slot over years of expansion and contraction. Standard drywall or trim nails aren't built for exterior exposure and tend to corrode or snap under the repeated movement vinyl siding goes through.
The head size matters almost as much as the length. A head too small can pull through the slotted hem during a hard freeze-thaw cycle or a windy afternoon, leaving the panel loose at that fastening point. Manufacturers typically specify a minimum head diameter for exactly this reason.
| Wall Assembly | Typical Nail Length | Why It Matters |
|---|---|---|
| Siding over plywood sheathing | 1 1/4 inch | Short enough to avoid pushing through interior material, long enough to bite into solid wood |
| Siding over foam insulation board | 1 3/4 to 2 inches | Nail has to pass through the foam layer and still reach solid framing |
| Re-siding over existing siding | 2 inches or longer | Extra layer of material means the nail needs more length to reach the studs |
Understanding the Nailing Hem and Slot System
Vinyl siding panels are built with a slotted nailing hem along the top edge, and that slot is designed to let the panel move side to side as temperatures change. The nail goes through the center of the slot, not snug against one end, which gives the panel room to shift without pulling the fastener loose or cracking the vinyl.
This is different from most other siding materials, where a tight, flush fastener is the goal. With vinyl, a nail driven flush and tight defeats the purpose of the slot entirely. The panel has nowhere to go when it expands, so it bows outward instead, which is what creates that rippled or wavy look on an older installation.
Step-by-step: How Vinyl Siding Panels Are Properly Fastened
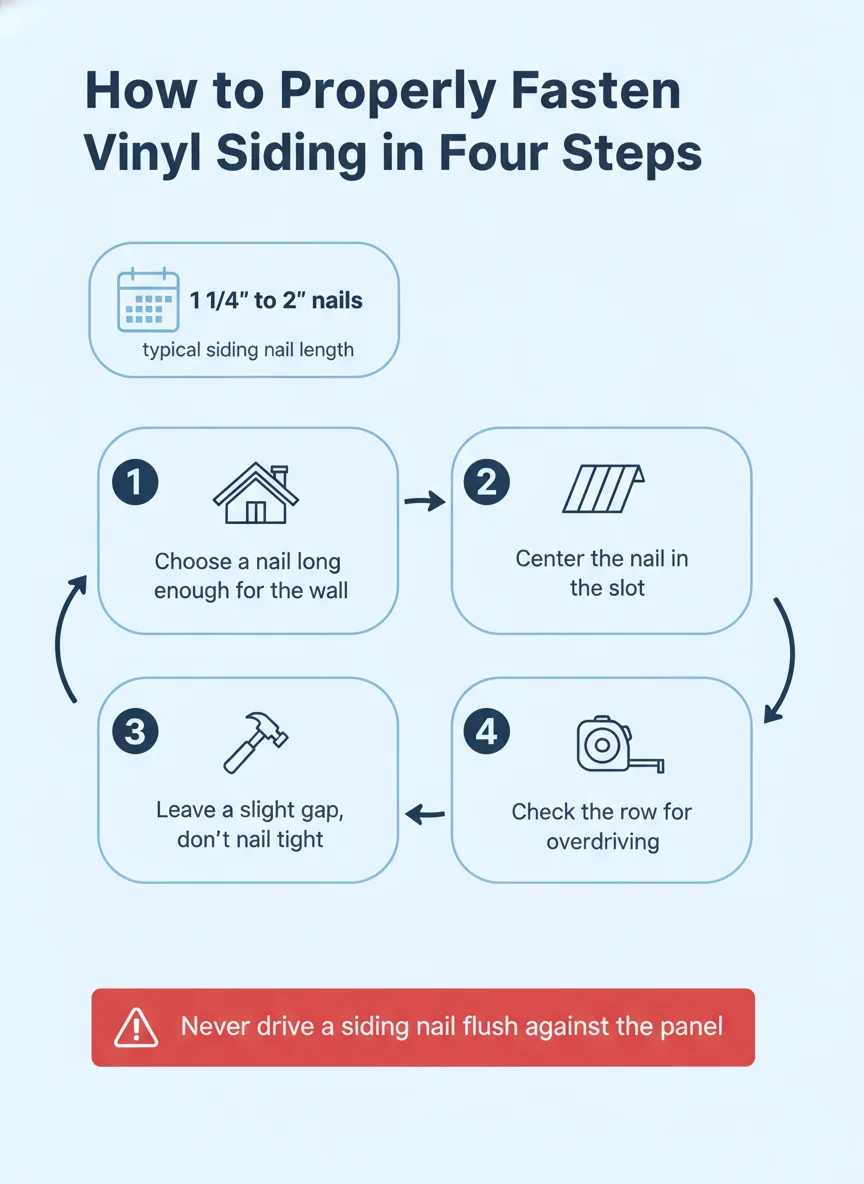
Proper fastening follows the same basic sequence on every wall, whether it's a single repaired panel or a full elevation. The details below outline what a correctly fastened panel looks like from the first nail to the last.
- Measure the wall buildup: Before fastening, confirm what's behind the panel, bare sheathing, foam board, or old siding, since that determines the nail length needed to reach solid framing.
- Select the correct nail: Choose a corrosion-resistant nail with a wide head, long enough to clear the wall assembly and penetrate solid wood by a reasonable margin.
- Center the nail in the slot: Drive the nail through the middle of the slotted nailing hem, never pushed to one end, so the panel can still shift with temperature changes.
- Leave a slight gap: Stop driving the nail before it pulls the panel tight against the wall, leaving roughly the thickness of a coin of play behind the nail head.
- Work left to right, row by row: Fasten each panel in sequence so overlaps and interlocks sit correctly before moving to the next row up the wall.
- Check for overdriven nails: Run a hand along each finished row to catch any nail driven too tight, since those are the spots most likely to buckle later.
What Loose or Buckled Siding Usually Means
Once siding is up, the two most common complaints are panels that rattle loose and panels that look wavy or buckled. Both point back to the fastening work, just in opposite directions.
Overdriven Nails
A nail driven too tight pins the panel in place and removes its ability to expand with heat. On a hot Texas afternoon, the trapped panel has nowhere to go but outward, which shows up as a visible wave or ripple, usually most noticeable on south and west-facing walls that get the most direct sun.
This isn't a cosmetic issue alone. Repeated expansion against an overdriven nail stresses the slot over time, and eventually the hem can crack or tear, which turns a visual problem into a panel that needs replacing.
Underdriven or Short Nails
On the other end, a nail that's too short or driven too loosely lets the panel shift more than it should, which shows up as rattling in wind or panels that visibly sag at the bottom edge. This is more common after a storm or a stretch of high wind, when a marginal fastening job finally gets tested.
Where siding meets the roofline, loose panels can also point to a trim or flashing issue rather than the siding itself, which is worth having checked alongside a general roof inspection if the problem is concentrated near the eaves.
DIY vs Calling a Pro for Siding and Trim Work
Replacing a single damaged panel or re-nailing a loose one is a reasonable weekend project for a homeowner comfortable with basic tools, as long as the replacement panel matches the existing profile and color. Most manufacturers make panels easy to unhook and reinstall without disturbing the rows above and below.
A full re-side, or a situation where buckling shows up across multiple walls, is a different scope entirely. That usually means the original fastening was done wrong across the board, which is more efficiently addressed by a crew that can correct the pattern consistently rather than patching one panel at a time.
Where siding problems overlap with the roofline, fascia, or drip edge, it's worth having that section looked at together rather than treating the siding and the roof trim as separate issues. A contractor who handles both can spot whether water intrusion at the roofline is contributing to the siding problem below it.
Getting the Fastening Right the First Time
Nail length seems like a small detail, but it's the difference between siding that holds up through years of North Texas heat and wind and siding that needs attention every season. Whether it's a repair, a full re-side, or just making sure the trim at the roofline is sealed up correctly, the fastening work underneath is what decides how the exterior performs long term.
For homeowners dealing with siding issues that trace back to the roofline, like loose trim near the eaves or water finding its way behind a panel after a missing shingle or wind event, it's worth having that section checked alongside the siding itself. Renovacore Builders LLC serves homeowners across Dallas and the surrounding DFW Metroplex with roofing work, and can point out when a siding or trim issue is tied to what's happening at the roofline.
Frequently asked questions
How long should nails be for vinyl siding?
Most vinyl siding installations use nails between 1 1/4 inch and 2 inches long, long enough to penetrate through the siding, any underlayment or foam board, and into solid framing or sheathing. The exact length depends on what's underneath the panel, including whether there's insulation board or old siding still on the wall.
What happens if siding nails are too short?
Nails that don't reach solid framing won't hold the panel securely, which leads to siding that rattles in wind, sags, or pulls loose over time. Short nails are a common cause of siding failure on walls with thick foam insulation where the original nail length wasn't adjusted.
Why is my vinyl siding buckling or waving?
Buckled or wavy siding is almost always caused by nails driven too tight against the panel, which doesn't allow the material to expand and contract with temperature. Vinyl panels are designed to move slightly with heat, and overdriven nails pin them in place, causing visible waves.
Can you nail vinyl siding directly into brick or masonry?
Yes, but it requires different fasteners and furring strips or masonry anchors rather than standard siding nails, since nails alone won't hold in solid masonry. This kind of installation needs planning before the first panel goes up, not fixes after the fact.
Should I call a professional to fix loose or damaged siding?
A professional is worth calling when more than a few panels are affected, when the damage traces back to the wall sheathing or trim, or when the problem repeats after a DIY fix. Isolated panel replacement is a reasonable DIY project, but recurring buckling usually points to a fastening issue that needs a trained eye.